Many of us will never come across a situation where we need to set a static IP
on our Windows machines, but in case you’ve come across one of those situation and are stuck,
follow along for a quick guide on setting a static IP in Windows 10.
Windows 10 makes it very easy to set a static IP on the computer, and the whole process generally
won’t take you more than a couple of minutes.
From the desktop:
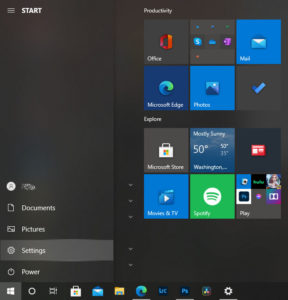
-Click the Windows/Start button and choose “Settings”.
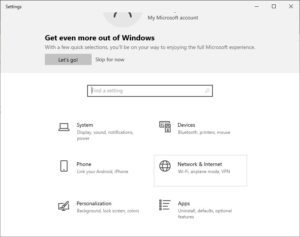
-On the following screen click “Network & Internet”.
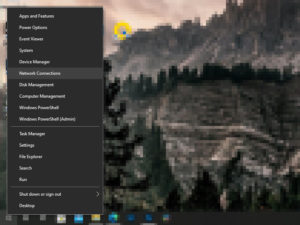
-Alternatively, right click the Windows/Start button and choose “Network Connections”.
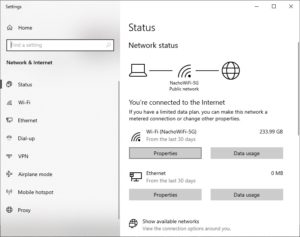
-Click “Properties” for your network adapter. You can see your active network adapter right under
“Network Status” on the same screen.
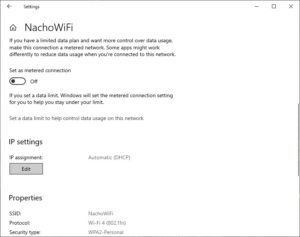
-Scroll down on the “Properties” window until you see “IP Settings” and under “IP assignment”
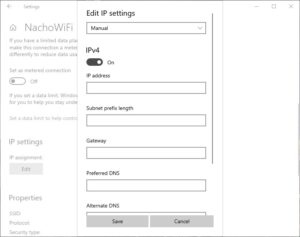
click “Edit”. You should get a little dialog window with a drop down menu, make sure to select
“Manual” here. Set the notch under “IPv4” to “ON”.
Hang in there, we’re almost all set!
– Now we’re able to set the IP address manually. In the “IP address” field we’re going to enter
our desired (or designated) local IP address. In “Subnet prefix length” we’re going to enter just
that, which will set our Netmask. In “Gateway” enter the IP for your gateway, usually your router’s
IP address. In “Preferred DNS” and “Alternate DNS” enter your desired DNS servers.
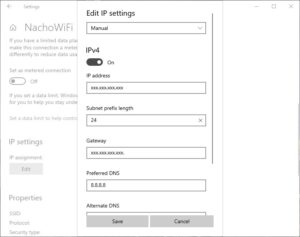
-Once everything is set up, hit “Save” and you should be good to go. Check that you can
still access local resources and the internet. If everything was set up correctly you should
be able to access everything same as before!
Thanks for reading, hopefully this quick guide helps you out! If you get stuck drop a comment.

